TAG LINE
TAG LINE
SMALL TITLE
Owners are configured in Setup / Users & Accounts / Owners / Configuration
From this screen you can configure owner specific settings such as the currencies supported under the owner, security settings, branding, mediation/rating options, invoice numbering, locales for multilingual support and additional features. The available options are detailed below.
The Owner Configuration panel to the left allows you to select related owner settings organized into sub-menus. Clicking on any of these items will show the current owner configuration for each group of settings.
The information in this panel reflects the sub-menu settings you have selected. From here you can modify owner settings (note: fields with a magenta left border are required).
Fiscal Year Starting Month: when the fiscal year starts for this owner
Bill Prepaid Adjustments: this setting allows you to control on how prepaid periods are billed. If this setting is enabled then account-packages will be billed for their entire period based on the account-package’s/account-service’s effective dates. The billing engine will determine what to charge for the period based on what billing events occur (the statuses that the account-services and account-packages are in during the period, any service activation events that occur, any discounts configured, etc.). For all of billing events related to the account-package/the account-services within the package the billing engine will determine if charges are appropriate and if so generate those charges (invoice items) based on the prices set and amount of time an account-service was in a particular status (e.g. bill X amount for the first 15 days that an account-service was in ‘pre-active’ status and Y amount for the final 15 days that that an account-service was in ‘active’ status). If this setting is disabled then only the initial prepaid package charges will be applied each billing period when the prepaid account-package is billed. Additional charges that are applicable based on changes made later in the period (account-service/account-package status changes, cancellations, refunds, etc.) will not be applied until the next billing period
Currencies tab
On this tab you can view, add, remove and edit the currencies setup under the owner, including the owner's default currency.
Note: currencies cannot be deleted once they are configured on entities in the system.
The currencies setup here can be selected when configuring an account's currency and also when configuring packages in the product catalog.
For instructions on how to add, remove and modify currencies see the Financial Settings Configuration Example article.
These settings define login restrictions applicable to users who log in to the LogiSense Billing application user interface (a.k.a. the AdminPortal). The settings presented are explained below.
Password Expiry: how frequently the user's password will expire (e.g. every 3 months)
Reset Period Valid For: how long the user will remain locked out once the 'Max Failed Sequential Logins' value has been reached
Absolute Session Timeout: defines a maximum amount of time in minutes that an AdminPortal user can use the system before being required to login again
Password History Policy:
History Length: how long previously used passwords will be remembered. This prevents password reuse within the time period specified
Intruder Lockout Policy:
Max Failed Sequential Logins: the number of login attempts before the user is locked out. Once the 'Reset Period Length' has been reached the user will no longer be locked out and additional login attempts can be made
Password Complexity Policy:
Minimum Length: the minimum number of characters the password can be set to
Only Allow Specified Characters: restrict the password to only the characters listed in the Valid Characters, Valid Numbers and Valid Symbols fields
For instructions how to adjust password policies see the Password Policy Configuration Example article.
On this tab you can populate details (Country, Address, Owner Vat#, etc.) which can be utilized with Invoice tokens and in some reports. You can also define the branding that appears in the LogiSense Billing AdminPortal from this tab. The logos configured here do not apply to invoices or other interfaces where logos may appear.
Large Logo: the logo that appears at the top of the left menu bar when the browser width exceeds 1280 pixels. When uploading a large logo the image must be no larger than 1 MB in size, at least 200x100 pixels in dimension and in a png, jpeg or gif image format
Small Logo: the logo that appears at the top of the left menu bar when the browser width is equal to or below 1280 pixels wide. When uploading a small logo the image must be no larger than 1 MB in size, 80x80 pixels in dimension and in a png, jpeg or gif image format
For details on how to setup branding and how it will appear see the Branding Configuration Example article.
These settings are applicable to systems setup to rate usage (data, airtime, messaging, etc.).
Dynamic Usage Class: enables the advanced dynamic usage classes feature. For more information see the Dynamic Usage Classes screen help
Rule Variable: specifies the custom field list to use when configuring a dynamic usage class. For more information see the Dynamic Usage Classes screen help
Amount Precision: specifies the number of digits to round the rated amount to after the decimal place (max of 11 digits supported). This value will be used if the Amount Precision value on the rate group is not set
Amount Rounding Type: this value is referenced if the Amount Rounding Type is not set on the Rate Group. If the Rounding Type is not set on the Rate Group nor the Owner then the rounding behavior will default to ‘Half Up’
Rate Plan: an owner level rate plan that can be used to rate usage if a rate plan is not found at a lower level (account level, account-package level, etc.)
Late Usage Rating Threshold: Allows back-dated usage on cancelled account-services to be processed for a period up to 365 days after the service was cancelled. Usage records with a date that falls within the service’s active period but received after the service was cancelled will be rated if the date the records are processed falls within the set late usage rating threshold (e.g. if the threshold is set to 30 days and a usage record is received 25 days post service cancellation, the usage will be processed). Any usage that comes in beyond the specified threshold value will go into exception (specifically, the “Usage Final Billed” exception type). Back-dated usage that falls within the set threshold will be processed and rated as though it came in during the billing period that the record’s usage dates fall within. Usage will be mediated, rated and bucketed based on any buckets attached to/used by the account-service in the specific billing period. A daily aggregate record will also be created that billing can pick up and bill
These settings allow you to configure custom invoice and credit note numbering schemes.
Notice: configuring the settings below after invoices/credit notes have been created within the system can cause overlapping of invoice/credit note numbers. Typically, automatic naming settings should be configured before any invoices or credit notes are generated on accounts.
Prefix: static text that precedes your invoice numbers (e.g. Invoice 1 is named LB-1). For example, if the prefix was set to “LB-” and the invoice number generated was '1' then the invoice would be named LB-1
Start: the number you want to start your invoice numbers with. If you used a previous billing system and the last invoice generated with that system had an invoice number of '13788', then you would set this value to 13789 to continue numbering invoices in sequence
Minimum Length: sets a minimum length for all invoice numbers. This setting is used if you want a constant spacing for invoice numbers. Leading zeroes will be used to set the invoice number length to this minimum value. A minimum length of ‘5' would format invoice number 1 as '00001' (assuming the Start value above was set to '0’)
For an example on how to configure an invoice and credit note numbering scheme see the Automatic Naming Configuration Example article.
These settings allow you to add, remove and configure the locales that you need to support for your invoices. For each locale you can download, edit and upload translations for user defined entities such as service and package names (e.g. 'Package A' becomes 'Product 1'). The translations provided will be referenced when an invoice template configured with the locale is used to render invoices.
For an example on how to configure locales see the Locales Configuration Example article.
From this panel you can view the payment types that are currently setup. When a payment gateway is configured the payment types the gateway supports will automatically be populated on this tab (Visa, Mastercard, ACH, etc.). Each payment type listed on this tab will indicate which payment gateway it goes through, or list no gateway at all if the payment type is strictly used to record payments on an account in the LogiSense Billing application and does not go through a gateway.
On the payment types tab you can also add manual/offline payment types by clicking the ![]() icon. As mentioned above, these manually added payment types can be used to record payments on accounts but will not go through a payment gateway. Manually added payment types can also be configured with General ledger codes if desired.
icon. As mentioned above, these manually added payment types can be used to record payments on accounts but will not go through a payment gateway. Manually added payment types can also be configured with General ledger codes if desired.
For an example on how to add a payment type see the Payment Types Configuration Example article.
This area allows you to enable the Customer Portal which is available with the LogiSense Billing Application. The Customer Portal provides an overview of account details (balance, invoices, usage details, etc.) and can be branded with your company logos and colors. Additional features can be enabled or disabled as desired such as the ability to make payments from the portal or cancel packages. Settings available in this section are detailed below.
You can customize email templates for emails that are sent in relation to the customer portal (for instance, the ‘reset password’ email can be customized).
Portal Settings:
Enable Customer Portal: disabled by default, this setting allows you to activate the customer portal and once enabled, adjust portal settings
Large Logo: the logo that appears at the top left corner of the portal when the browser width exceeds 1280 pixels. When uploading a large logo the image must be no larger than 1 MB in size, at least 200x100 pixels in dimension and in a png, jpeg or gif image format
Small Logo: the logo that appears at the top left corner of the portal when the browser width is equal to or below 1280 pixels wide. When uploading a small logo the image must be no larger than 1 MB in size, 80x80 pixels in dimension and in a png, jpeg or gif image format
Primary Color: the color of the left side menu in the customer portal
Secondary Color: the color used at the top of the customer portal
Permission Setting:
Allow Payment Method Updates: when enabled the customer will be able to modify their existing payment method settings (e.g. update the expiry date of a credit card). This setting cannot be activated if the system hasn’t been configured to integrate with a payment gateway.
Allow Adding Payment Methods: when enabled the customer will be able to add new payment methods to their account in the customer portal. This setting cannot be activated if the system hasn’t been configured to integrate with a payment gateway.
Allow Account Payments: when enabled the customer will be able to make payments in the portal, utilizing the payment gateway configuration setup in the LogiSense Billing application. This setting cannot be activated if the system hasn’t been configured to integrate with a payment gateway.
Allow Product Cancellations: when enabled customers will be able to cancel packages in the portal
Account View: allows you to define the default account hierarchy view to be displayed in a parent/child view instead or an Invoicer view
This menu allows you to enable and configure SAML settings to integrate with a third party identity provider in order to enable single sign-on (SSO) functionality. Okta and Azure AD integrations are currently supported in LogiSense Billing.
For instructions on how to configure SSO for Okta or Azure see the Single Sign On Configuration guide.
SAML Settings
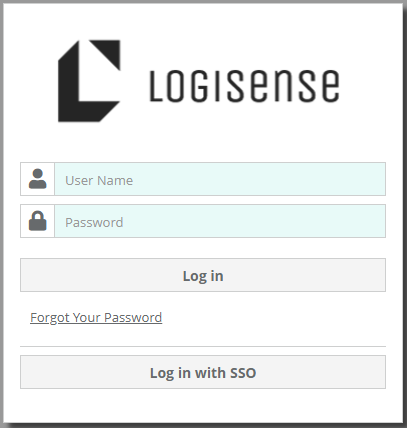
Enabled: enables SSO. Once this option is set a ‘Log in with SSO’ option will appear when logging into the LogiSense Billing AdminPortal
Entity ID: the Entity ID value setup on the identity provider
Provider Metadata URL: a URL from the identity provider that contains all of the SAML specific settings used to enable the SSO integration
LogiSense Billing Entity ID: ID used when configuring a SAML endpoint (e.g. Azure)
LogiSense Billing Single Sign-On URL: URL used when configuring a SAML endpoint
LogiSense Billing Tenant URL: URL used when configuring a SAML endpoint
Test Settings: verifies that the supplied Entity ID and Provider Metadata URL are correct
SCIM Access Token
Get Token: generates a token that will grant an identity provider access to the LogiSense Billing application. The generated token needs to be copied into the identity provider portal to enable the integration. See the Single Sign On Configuration guide for instructions on how to configure the token in the identity provider portal
Refresh Token: generates a new token. This will prevent SSO users from logging into the LogiSense Billing application until the new token is updated in the identity provider portal
Clear Token: clears the current token which will prevent SSO users from logging into the LogiSense Billing application until a new token is generated and the new token is updated in the identity provider portal
This tab indicates if a reporting database has been configured. When the reporting database is enabled report data in LogiSense Billing can be synced to a replica database. For more information on this feature please contact LogiSense.