TAG LINE
TAG LINE
SMALL TITLE
Install the latest version of the LogiSense Billing for Salesforce App in your production/sandbox Salesforce instance (Classic or Lightning are both supported).
IMPORTANT! If this is the first time installing the app on a fresh Salesforce instance follow the steps below during the install process
Select the third option Install for Specific Profiles
Scroll down on the Install page and configure the profiles which will have LogiSense Standard User vs. LogiSense Standard Admin permissions

LogiSense Standard User - Provides full access to all sales related objects (i.e. accounts, contacts, opportunities) however users do not have access to sync products, price books or create custom field mapping
LogiSense Standard Admin - Provides full access to the application including ability to sync products, price books, custom field mapping as well as access to API request logs
Click Install
After installing the app switch to either LogiSense Lightning or LogiSense in the App Launcher
Configure Account Page Layouts to display relevant LogiSense Billing data
Note: the following steps assume that you are creating a custom section for all LogiSense related fields. However, you can mix the fields in with existing ones on your current layouts if desired. ID fields that are listed are not required and used mainly for testing and support. All other fields require values and therefore must be added to your layouts are you can create a custom trigger that sets default values
Load the Object Manager
Access Page Layouts and modify the layouts that need to present LogiSense Billing data
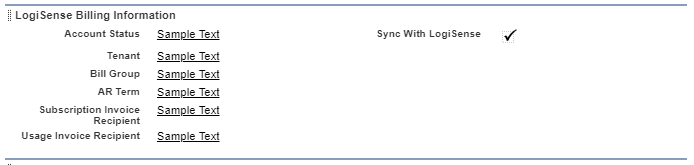
Custom data can be grouped into a 'LogiSense' section or added to existing layout sections as needed. The following fields are required to successfully sync data with LogiSense Billing:
Tenant
AR Term
Bill Group
Account Status
Subscription Invoice Recipient
Usage Invoice Recipient
Sync With LogiSense
Create a new section to display LogiSense Billing invoice data, and add the 'InvoiceList' Visualforce page to that section:
Edit the properties of the InvoiceList and enable scrolling
For more information how to configure which columns will be displayed, refer to the 'Account Invoice List' section below. To view the invoice, click on the Invoice Name/Id in the Visualforce page on the account object and it will launch a PDF version of the invoice as it appears in LogiSense Billing
Add the 'Sync With LogiSense' button/action under Buttons or Mobile & Lightning Actions
Lightning:
Classic:

Contact Object Layout
Create a new section on the Contact page layout and add the following fields:
Contact Type
Opportunity Object Layout
Create a new section on the Opportunity page layout and add the following fields:
Buttons or Mobile & Lightning Actions
Sync With LogiSense
Opportunity Product Layout
Create a new section for LogiSense and add the following fields:
Minimum Term
Account Product Code Name
Create a new section (e.g. 'LogiSense Product Services') and add the following Visualforce page:
OpportunityProductServicesListing
Enable 'Show scrollbars' on OpportunityProductServicesListing
Create a new section (e.g 'LogiSense Share Plans') and add the following Visualforce page (only if you are using Share Plans in LogiSense):
SharePlanListing
Enable 'Show scrollbars' on SharePlanListing
Product Layout
Create a new section for the LogiSense data and add the following fields:
Minimum Term
Base Time Unit
Base Frequency
Order Object Layout
Add the following Button or Mobile & Lightning Actions
Sync With LogiSense